Showing posts with label Lecien Flower Sugar Quilt. Show all posts

Friday, 5 June 2015

Farmer’s Wife Quilt Along Month 10


This month we are adding the final outside border and making the binding.

You will need 2 metres of large floral fabric in your choice of Pink or Aqua.

Cutting the Outside Borders.
Lay the folded fabric down on your cutting mat with the fold on the right and the selvages aligned on the left.

Measure across, from the inside edge of the selvage and start cutting an 8’’ strip along the entire edge of the fabric to give you 2 x 8’’ border strips. Use a second ruler to help keep your cutting line straight.  Proceed slowly smoothing the fabric as you go.

Come back to the start and repeat with a second pair of 8’’ border strips.  This should leave you with 5’’ to the fold. 

Flip the first border, keeping the edges even, measure 8’’ from the cut edge and cut off the selvages to give you 4 x 8’’ strips 2mtrs long.


Cutting the Binding Strips.
Come back to the start again and cut a 2 ½’’ strip along the length of the 5’’ fabric strip.  Open up the remaining strip and cut again along the fold to give you 4 x 2 ½’’ x 2mtrs binding strips. 

Cut the ends of these binding strips on a 45d angle.
 
 
Sewing the Outside Borders.

Measure your quilt top through the centre from top to bottom and cut one pair of 8’’ strips to this length.  Pin and sew these evenly to each side of your quilt. You may have to ease these along as the large #71 triangles do tend to stretch a bit. Press seams towards the borders.

Repeat this process measuring from side to side for the top and bottom border strips.

Now your Farmer’s Wife Quilt top really is finished!  We really love this beautiful quilt and hope you are as in love with it as we are! xxx

Sewing the Binding.
Join the binding strips end to end with a ¼’’ seam, keeping the edges even.   Press these seams open and press a ¼’’ hem on one end.

Fold the long strip in half, with wrong sides together, and press to make a long doubled over strip of binding.  Neatly roll up ready for finishing off your quilted quilt.


Saturday, 11 April 2015

Farmer’s Wife Quilt Along Month 9 Instructions.


Templates for Month 9 are 13, 19, 22, 71 and 106.

This month we are turning all those lovely little blocks into a quilt top by adding the sashing strips and squares and the small, medium and large triangles. 

Before starting, starch and press each block and then DOUBLE CHECK THAT EACH BLOCK MEASURES 6 ½’’ SQUARE.  If it doesn’t, you may need to unpick a small section here and there and resew or trim it to fit. 

Starch the Floral Flower Sugar fabric as before and iron well before cutting.

Sashing Strips use template #106 and cut 144.

Using the White Small Spot fabric, fold with the selvedges together and cut the selvedge edge off then cut 6 ½’’ strips across the width of the fabric. Crosscut these into 6 ½’’ x 1 ½’’ strips.  You should get 28 #106 from each strip.

Sashing squares and Small triangles use template #19 and cut 60 and template #13 and cut 24.

Using the Pink or Aqua Small Spot fabric fold and remove selvedge as before then cut 2 x 1 ½’’ strips across the fabric.  Then cut 1 x 2’’ strip across the fabric.  Crosscut the 1 ½’’ strips into 1 ½’’ squares.  You should get 28 # 19 from each strip.  Then crosscut the 2’’ strip into 12 x 2’’ squares and crosscut these on the diagonal and trim into 24 # 13.  Use the rest of this strip to cut the remaining # 19s.

Large and Medium Setting Triangles use templates #71 and cut 20 and template #22 and cut 4.

Using the Floral Doily Dot fabric trim selvedge as before and cut 2 x 7’’ strips across the width of the fabric.  Crosscut the strips into 7’’ squares, you should get 6 x 7’’ squares from each strip.  Crosscut these on the diagonal and trim into 20 #71.  Then cut 2 x 5 ½’’ squares, crosscut these on the diagonal and trim to give you 4 x #22.  When pressing these triangles, be careful not to stretch the long edge, just lift the iron up and down without sideways motion.

 Arranging the Quilt Blocks.

Find a large flat surface, I use a spare double bed, or the floor but a design wall would be best, and start to lay out 61 blocks, on point, making six rows across by six rows down on the diagonal.  Save the other three blocks for the back.   Remember how we made two matching blocks in each week. Try to spread these around the quilt to balance the colour.  The Red is the most dominant colour so try to spread that evenly around the quilt too.  Walk away for a while, when you come back you will notice any blocks in the wrong place.  Repeat this a few times until you are happy with the layout then take a photo of it.  Any layout problems seem to show up better in a photo. You can arrange the sashing strips and squares in between as you go if you wish.  I just kept mine in a pile until I sewed the blocks together.


NOTE:   To make a design wall all you need is a piece of Quilt wadding larger than the quilt ( 2 .10 mts square) you can then use this for the quilt construction, some tape that won’t damage the wall surface underneath, like repositionable  double sided or washi tape and a wall to fit.  Test the tape in an inconspicuous place first.  Tape the wadding to the wall and you will find that the blocks stick to the wadding. 

If you can leave the quilt blocks in place while you sew them together cut up 22 small pieces of paper and number them Rows 1-11 and Blocks 1-11.  Starting in the top left corner, pin the Row numbers to the first block in each row and pin the block numbers to the row you are about to sew together.  This keeps the blocks in order and the correct orientation.

If you can’t leave the quilt in place, cut up 61 pieces of paper and number them for each Row and Block and pin the numbers in place to each block as Row 1, Row 2 Block 1, Row 2 Block 2, Row 2 Block 3 and Row 3 block 1 etc.  Store each row in a separate plastic cliplock or paper bag until you sew them together.

If you use the instructions in your Farmer’s Wife book for the quilt layout and construction, you’ll need to follow the King size layout which has the four # 22s in the corners because it is the only square layout, like ours, but only use six rows of blocks each side. 

Sewing the Quilt Top Together.

NOTE:   PRESS ALL SEAMS TOWARDS THE SASHING. Usually when using a lighter fabric for sashing the seams are pressed towards the blocks but with so many seams in these blocks they naturally lay flat and you would be fighting with them to sit neatly.

Block Row.
Starting with row 1, sew a # 106 strip to each side of the row 1 block and press the seams towards the sashing. 


Using the photo for the correct direction pin and sew a #71 large triangle to each side and press
seams towards the sashing.


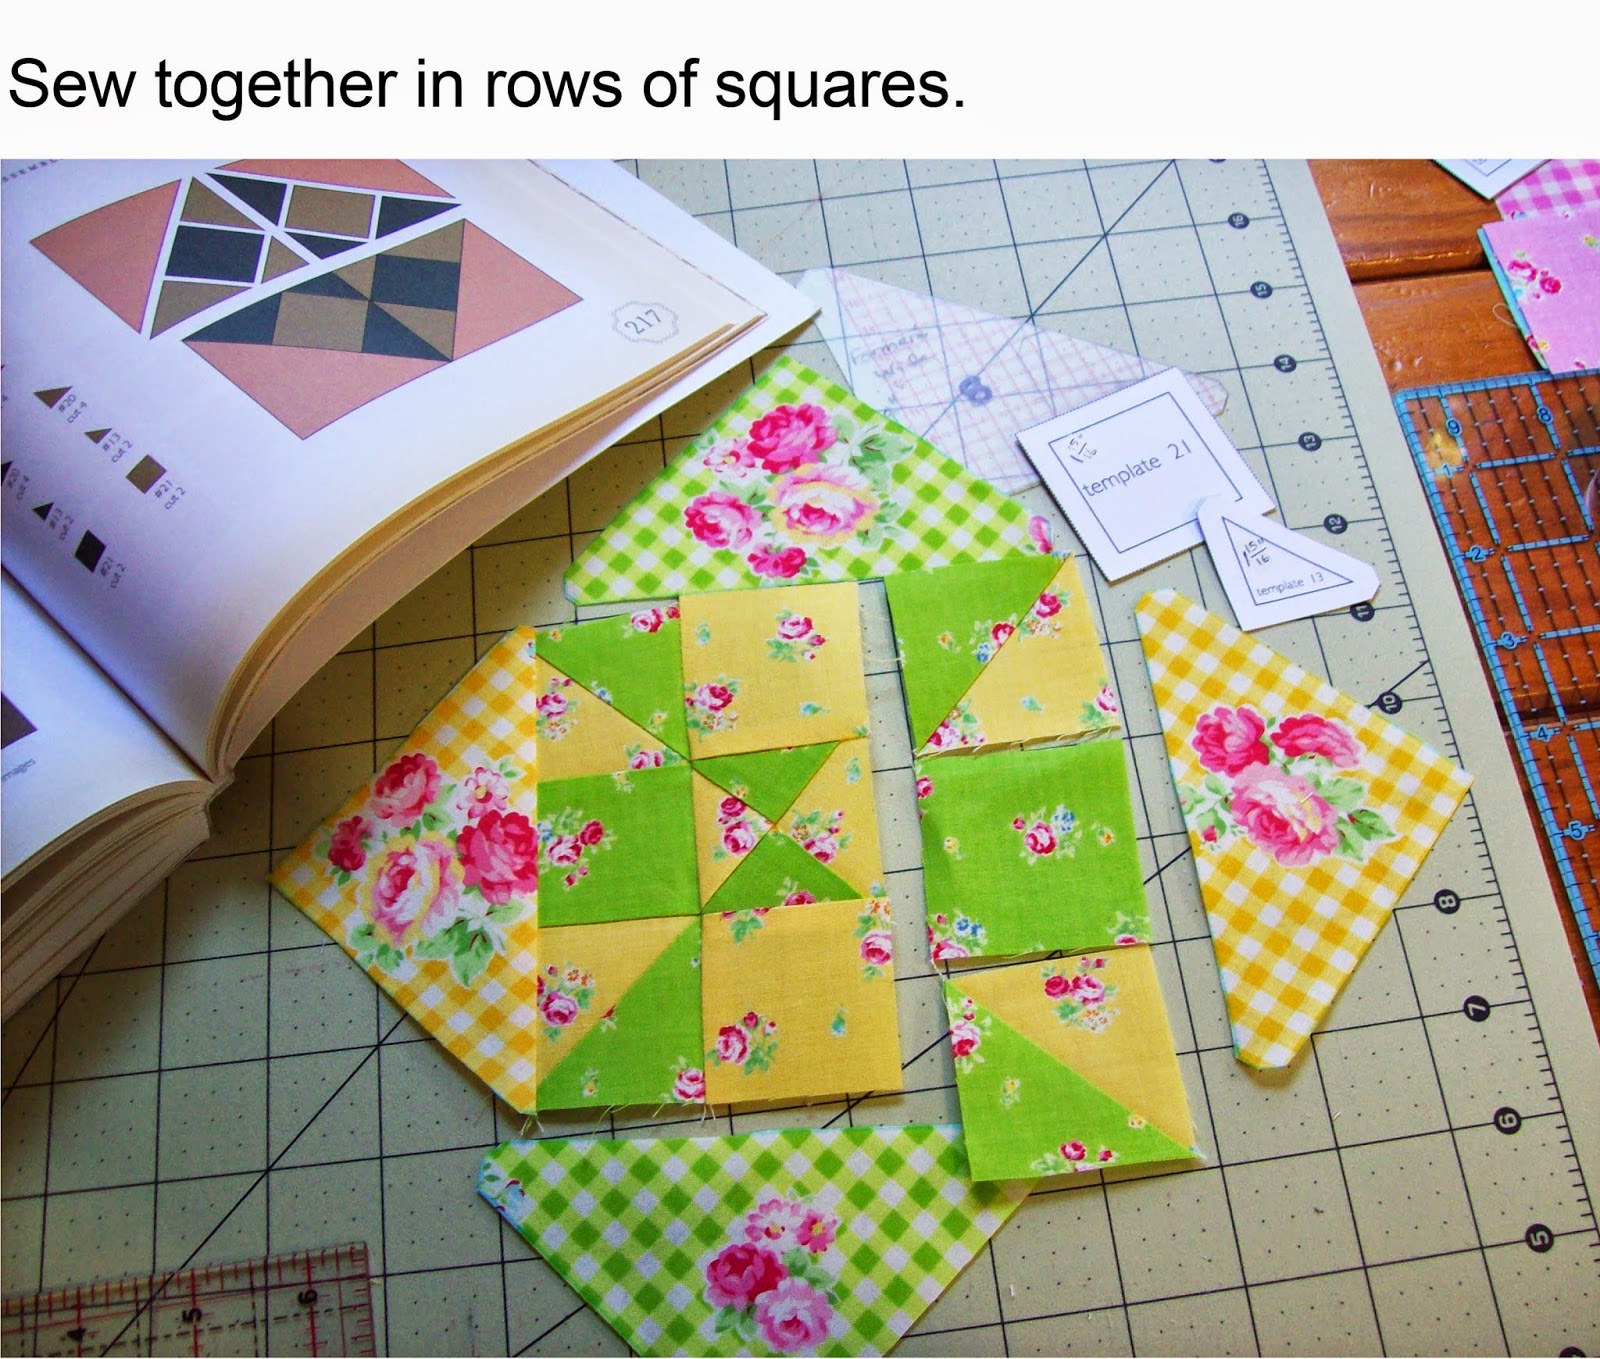
Place this down and arrange one # 106 strip, two #13 small triangles, FACING THE RIGHT WAY and one #22  medium triangle in the correct place above the row 1 block.  Pin and sew the two #13 to #106 and press as before and sew this to the top, matching the seam joins.  Fold the block row in half and mark the centre top with a pin.  Fold the #22 in half and mark centre bottom with a pin.  Match pins and corners and sew together.  Repeat this when sewing the other three corners.

Sashing Row.


Sew one #19 to the end of one #106 and repeat, sew them together and sew one #13 to each end and press.   Sew this row to the lower edge of the first block row carefully matching the seam joins which should nest together in opposite directions and press towards the sashing.

Continue sewing the diagonal rows adding a sashing row to the lower edge of each block row.  Sew them together until you finish row four.


Sew row five as before but don’t join to row four yet.  

Sew row six THIS IS THE CENTRE ROW with a #22 triangle at each end.

Sew row seven together noting that the #71 large triangles are now angled the other way.   Sew these three rows together with the sashing rows and press.  Then join this section to row four and press.  This keeps the amount of fabric under the machine more manageable.


Continue sewing as before from rows eight to eleven, adding the sashing rows in between.  Complete the corner with the last #22 medium triangle and press.  Join this section to the rest of the quilt, press and you’re done.

 
We are so excited to see our beautiful little blocks come together in this lovely quilt top and can’t wait to have it on the wall!  Now we might have time to sit and read all those heartfelt letters in the book and dream about an ideal farming life!
 
Debby & Eve


Tuesday, 13 May 2014

Farmers Wife Quilt Along - Month 4 Instructions


We will be making Blocks, 39, 19, 56, 48, 7, 105, 90, 61.

Templates for month 4 are, 1, 3, 4, 7, 8, 13, 19, 20, 21, 45, 52, 94.

Before starting spray a light coating of starch on the wrong side of all the fabrics.  Iron and cut as usual.  This range of Flower Sugar fabrics are printed on a beautiful, fine base fabric, great for most sewing but not for small triangles.

Week 13


Use Templates 7, 8, 13, 20, 21 and 45.

Template # 21 measures 1 15/16’’. If you place the fabric against the inside of the thicker 2 inch line, on your ruler this seems about right, most rulers only mark the 1/8’’. If you are worried about this cut a 2’’ square and trim using the template.

Friendship. Using the White small roses, trace and cut 4 #45. Trace and cut 1 each of #7 and #8 from each of the 4 medium rose fabrics, 1 in Red, Yellow, Pink and Aqua. Arrange and sew together as per book.

Checkerboard.  Using the White small Rose fabric, cut 4 x 1 15/16’’squares for #21.
For rotary cutting, cut 2 x 1 15/16’’ squares and 4 x2 ¼’’ squares, cut these on the diagonal to give you 4 # 13 and 8 #20.

Cut 9 x 1 15/16’’squares, 1 in Red and 2 each in Pink, Yellow and Aqua in the Medium roses and then 2 in the Green small roses to give you 9 #21. Arrange and sew together as per book.


Week 14


Use templates 1, 3, 7, 19, and 52.

Maple Leaf. From the Green small roses trace and cut 1 #52 and 1 x 2 ½’’ square for 1 #1.
Cut 1 x 2 ½’’ square and 1 #3 each in Red and Yellow Medium roses then, cut 1 x 2 7/8’’ square in Pink medium roses and cut on the diagonal for 2 #3.
Using the Aqua Spot cut 1 x2 ½’’ square #1 and 2 x 2 7/8’’ and 1 x 2 3/8’’ squares, cut on the diagonal for 4 # 3 and 2 # 7. Arrange as per photo and book.

Homeward Bound. Using the Aqua Spot fabric cut 1 x 2 ½’’ square, #1 and 4 x 1 ½’’ squares for 4 # 19.
Cut 1 x 2 ½’’ and 2 x 1 ½’’ squares each in Aqua, Pink and Yellow medium roses and Green small roses. Then cut 4 x 1 ½’’ squares in Red medium roses to give you 4 #1 and 12 #19. Arrange as per photo, sew corners into 2 ½’’ squares and sew together in rows.


Week 15


Use templates 8, 13, 20 and 94.

Birds in the Air.  Note that I have reversed the position of the light and dark fabrics in this block.

Using the Aqua spot cut 12 x 2’’ squares, cut on the diagonal and trim to give you 24 #13. Trace and cut 3 #13 each in Green, Pink, Yellow and Aqua small roses.

Note: I didn’t Fussy Cut my #8 for this block but they looked so pretty with the roses in the centre in week 16 that I suggest you do. There is enough fabric to do so. Just check, the Green Check fabric, to ensure that you can still fit #94 BEFORE Fussy cutting the 3 #8.

Trace and Fussy cut 3 #8 in Pink, Yellow, Green and Aqua Check roses. Save 2 of each colour for blocks 90 and 61.
String piece the Aqua and coloured # 13s together, press and trim to 1 ½’’ squares. Arrange in place, sew together in rows adding the Aqua spot #13s to complete the triangle.  Sew together with the matching Check triangle, press and trim to 3 ½’’ squares and sew as per photo.


Wild Goose Chase.  This is a quick and easy way to make Flying Geese Blocks.  It makes 4 at once, as we need 12 that number is just right.

Using the Aqua Spot cut 12 x 1 7/8’’ squares. Using a sharp pencil draw a diagonal line across the wrong side, or press a crease as per week 3.
Then cut 1 x 3 ¼’’ square from each of the Pink, Yellow and Aqua Small rose fabric.

Follow the photos for this:
Pin two Aqua squares, right sides together, to opposite corners of the bigger coloured square, overlapping the corners in the centre so that the line or crease runs from corner to corner.
Stitch ¼’’ either side of this line and cut apart on the line. Press seam towards the coloured side.
Pin two more squares as before to the remaining corners, sew cut and press as before, trim to 1 ½’’ x 2 ½’’ rectangle.  Repeat with the other squares.  Now you have your 12 Flying Geese. Arrange as in the photo and sew the Geese units together in two rows of six.
Cut 1 # 94 in Green Check Roses and sew this between the Flying Geese.


Week 16


Use Templates 4, 8, 13, 20 and 21.

Storm Signal.  Start with your four Fussy Cut #8, two Yellow and two Green.
Using the Yellow small roses cut 3 x 1 15/16’’squares, cut 1 of these on the diagonal to give you 2 # 21 and 2 #13. Then cut 2 x 2 ¼’’ squares.  Repeat this with the Green small roses.  Using both coloured 2 ¼’’ squares make up 2 x ½ square triangles as per week 3.  Make up centre square using the four #13. Sew together in rows then add the corner triangles.


Northern Lights. Start with your 2 Aqua and 2 Pink check Fussy Cut #8s.
Using the Pink small roses cut 4 x 2’’ squares. Repeat with the Aqua small roses, to give you 8 #4.  Sew these in pairs and press towards the aqua.  Pair up again into 4, sew and press.  Sew the check triangles together, press and trim to 3 ½’’.  Sew these together as per book and press.


Wow that’s month 4 done. Aren’t they just so pretty! I hope you are enjoying these as much as we are!

Debby & Eve x


Thursday, 10 April 2014

Farmer’s Wife Quilt Along - Month 3 Instructions


Templates for month 3 are, 4, 5, 7, 8, 12, 33, 34, 38, 48, 16, 16R

We are making blocks, 64, 74, 34, 103, 31, 51, 45, 101.

We have supplied extra fabric this month for Fussy Cutting. As so much is cut this way I haven’t provided a cutting guide.


Week 9


Use templates 7, 16 and 16R.

Using the white/small floral fabric cut 16 x 2 3/8’’ squares.
Then cut 2 x 2 3/8’’ squares each in Pink Cherries, Yellow, Red and Green.
Use 8 white squares together with the coloured squares and construct ½ square triangles as per block 11, trim to 2’’ squares, for 32 template #7. Arrange as shown in the book and photo.

Cut the other 8 white squares on the diagonal and trim, to give you 16 template #7.
Trace and cut 4 x template #16 in Pink Cherries. Trace and cut 4 x template #16R in Red.
Arrange top half as per book. String piece together and trim units into 2’’ x 3 ½’’ rectangles.
Sew together as per book. Repeat with the other half.

Now YOU have a choice! Either sew them together as Ribbons, as in the book OR reverse the lower section and sew them as Chevrons. I like both ways but I thought I should stick to the pattern. You can choose which way that you like best!


Week 10


Use templates 4, 5, 7 and 8.

In the Yellow Roses fabric, Fussy cut a 3 ½’’ square, for template #5, then cut a 4’’ square, for 2 template #8, then cut 4 x 2’’ squares for template #4 and then, 8 x 2 3/8’’ squares, for 16 template #7.
In the Pink Spot fabric cut a 4’’ square for 2 template #8 and then cut 8 x 2 3/8’’ squares, for 16 template #7.
Sew the 4’’ squares together, as per week 3 and trim to 3 ½’’ and then the 8 x 2 3/8’’pairs, 1 yellow and 1 pink, as per week 3, and trim to 2’’ squares.
Arrange the pieces as per book and photo and sew together.


Week 11


Use templates 4, 5, 7, 8 and 12.

These 2 blocks use the floral part of the White Rose Bouquet print.
Using the White Rose Bouquet fabric, Fussy cut, on the roses, a 3 ½’’ square for template #5 and a 4’’ square , cut on the diagonal, for 2 x template #8.
Cut 8 x 2’’ squares in Red for 8 template #4.

Using the Pink floral cut 2 x 3’’ squares, cut on the diagonal, for 4 template #12. Then cut 5 x 2 3/8’’ squares and cut 2 of these on the diagonal for 4 template #7 for block #51. Save 3 for ½ square triangles.

Using the Green fabric cut 7 x 2 3/8’’ squares. Cut 4 of these on the diagonal for the 4 template #7 in block 31. Then make up with the remaining 2 Pink 3/8’’ squares, 3 of each as per week 3. Arrange as per book and photo and sew together.


Week 12


Use templates 33, 34, 38 and 48.

These 2 blocks use the White/Cherry background part of the White Rose Bouquet print.
Template #34 measures 1 5/8’’ but when I used this measurement the block 101 only came to 6 ¼’’ square, so I have cut all mine 1 ¾’’ instead and used a slightly wider seam as I sewed them together. Start by sewing the centre row of block 101, press and measure. Adjust the seams to measure 6 ½’’ and use this seam allowance for the rest of the block. Remember, if you do need to trim, keep all the lines level with the ruler, horizontal, vertical and diagonal!

Using the White/Cherry background part of the fabric, Fussy cut 2 x 1 ¾’’ squares, with cherries in the centre, for 2 template #34, 1 for each block. Then trace and Fussy cut 2 x 4 1/8’’ x 1 ¾’’ rectangles to give you 2 template #48 and 1 template #33 also with cherries. Then trace and Fussy cut 10 template #38 also on the cherry background fabric.

Using the Pink Cherry fabric cut 1 template # 33, then cut 11 template #38, then cut 4 x 1¾’’squares for template #34, then cut 4 x 2 1/8’’ squares, made into ½ square triangles, to give you 8 template # 38.
Using the Pink Floral fabric cut 1 template # 33, then cut 1 x 2 1/8’’ square and cut on the diagonal for 2 template # 38, then cut 4 x 1 ¾’’ squares for template #34 and 6 2 1/8’’’’ squares for ½ square triangles.
Cut from the Green fabric 6 x 2 1/8’’ squares and 1 template # 38.
As per week 3 make up 2 Green and Pink Cherry, 4 Green and Pink floral and 2 Pink Cherry and Pink Floral ½ square triangles using the 2 1/8’’ squares.

Sew the White and Pink Cherry template # 38s together and the Green and Pink Cherry one. Press and arrange in place. These blocks are quite complicated so go slowly. Trim as needed to make your block measure 6 ½’’ square.


Good luck everybody with these last two blocks. 
Remember there are no mistakes just unique handmade works of fabric art. 

Debby & Eve