Showing posts with label Farmers Wife Quilt Along. Show all posts

Saturday, 11 April 2015

Farmer’s Wife Quilt Along Month 9 Instructions.


Templates for Month 9 are 13, 19, 22, 71 and 106.

This month we are turning all those lovely little blocks into a quilt top by adding the sashing strips and squares and the small, medium and large triangles. 

Before starting, starch and press each block and then DOUBLE CHECK THAT EACH BLOCK MEASURES 6 ½’’ SQUARE.  If it doesn’t, you may need to unpick a small section here and there and resew or trim it to fit. 

Starch the Floral Flower Sugar fabric as before and iron well before cutting.

Sashing Strips use template #106 and cut 144.

Using the White Small Spot fabric, fold with the selvedges together and cut the selvedge edge off then cut 6 ½’’ strips across the width of the fabric. Crosscut these into 6 ½’’ x 1 ½’’ strips.  You should get 28 #106 from each strip.

Sashing squares and Small triangles use template #19 and cut 60 and template #13 and cut 24.

Using the Pink or Aqua Small Spot fabric fold and remove selvedge as before then cut 2 x 1 ½’’ strips across the fabric.  Then cut 1 x 2’’ strip across the fabric.  Crosscut the 1 ½’’ strips into 1 ½’’ squares.  You should get 28 # 19 from each strip.  Then crosscut the 2’’ strip into 12 x 2’’ squares and crosscut these on the diagonal and trim into 24 # 13.  Use the rest of this strip to cut the remaining # 19s.

Large and Medium Setting Triangles use templates #71 and cut 20 and template #22 and cut 4.

Using the Floral Doily Dot fabric trim selvedge as before and cut 2 x 7’’ strips across the width of the fabric.  Crosscut the strips into 7’’ squares, you should get 6 x 7’’ squares from each strip.  Crosscut these on the diagonal and trim into 20 #71.  Then cut 2 x 5 ½’’ squares, crosscut these on the diagonal and trim to give you 4 x #22.  When pressing these triangles, be careful not to stretch the long edge, just lift the iron up and down without sideways motion.

 Arranging the Quilt Blocks.

Find a large flat surface, I use a spare double bed, or the floor but a design wall would be best, and start to lay out 61 blocks, on point, making six rows across by six rows down on the diagonal.  Save the other three blocks for the back.   Remember how we made two matching blocks in each week. Try to spread these around the quilt to balance the colour.  The Red is the most dominant colour so try to spread that evenly around the quilt too.  Walk away for a while, when you come back you will notice any blocks in the wrong place.  Repeat this a few times until you are happy with the layout then take a photo of it.  Any layout problems seem to show up better in a photo. You can arrange the sashing strips and squares in between as you go if you wish.  I just kept mine in a pile until I sewed the blocks together.


NOTE:   To make a design wall all you need is a piece of Quilt wadding larger than the quilt ( 2 .10 mts square) you can then use this for the quilt construction, some tape that won’t damage the wall surface underneath, like repositionable  double sided or washi tape and a wall to fit.  Test the tape in an inconspicuous place first.  Tape the wadding to the wall and you will find that the blocks stick to the wadding. 

If you can leave the quilt blocks in place while you sew them together cut up 22 small pieces of paper and number them Rows 1-11 and Blocks 1-11.  Starting in the top left corner, pin the Row numbers to the first block in each row and pin the block numbers to the row you are about to sew together.  This keeps the blocks in order and the correct orientation.

If you can’t leave the quilt in place, cut up 61 pieces of paper and number them for each Row and Block and pin the numbers in place to each block as Row 1, Row 2 Block 1, Row 2 Block 2, Row 2 Block 3 and Row 3 block 1 etc.  Store each row in a separate plastic cliplock or paper bag until you sew them together.

If you use the instructions in your Farmer’s Wife book for the quilt layout and construction, you’ll need to follow the King size layout which has the four # 22s in the corners because it is the only square layout, like ours, but only use six rows of blocks each side. 

Sewing the Quilt Top Together.

NOTE:   PRESS ALL SEAMS TOWARDS THE SASHING. Usually when using a lighter fabric for sashing the seams are pressed towards the blocks but with so many seams in these blocks they naturally lay flat and you would be fighting with them to sit neatly.

Block Row.
Starting with row 1, sew a # 106 strip to each side of the row 1 block and press the seams towards the sashing. 


Using the photo for the correct direction pin and sew a #71 large triangle to each side and press
seams towards the sashing.


Place this down and arrange one # 106 strip, two #13 small triangles, FACING THE RIGHT WAY and one #22  medium triangle in the correct place above the row 1 block.  Pin and sew the two #13 to #106 and press as before and sew this to the top, matching the seam joins.  Fold the block row in half and mark the centre top with a pin.  Fold the #22 in half and mark centre bottom with a pin.  Match pins and corners and sew together.  Repeat this when sewing the other three corners.

Sashing Row.


Sew one #19 to the end of one #106 and repeat, sew them together and sew one #13 to each end and press.   Sew this row to the lower edge of the first block row carefully matching the seam joins which should nest together in opposite directions and press towards the sashing.

Continue sewing the diagonal rows adding a sashing row to the lower edge of each block row.  Sew them together until you finish row four.


Sew row five as before but don’t join to row four yet.  

Sew row six THIS IS THE CENTRE ROW with a #22 triangle at each end.

Sew row seven together noting that the #71 large triangles are now angled the other way.   Sew these three rows together with the sashing rows and press.  Then join this section to row four and press.  This keeps the amount of fabric under the machine more manageable.


Continue sewing as before from rows eight to eleven, adding the sashing rows in between.  Complete the corner with the last #22 medium triangle and press.  Join this section to the rest of the quilt, press and you’re done.

 
We are so excited to see our beautiful little blocks come together in this lovely quilt top and can’t wait to have it on the wall!  Now we might have time to sit and read all those heartfelt letters in the book and dream about an ideal farming life!
 
Debby & Eve


Wednesday, 16 July 2014

Farmers Wife Quilt Along Month 6 Instructions


We will be making blocks 14, 88, 40, 62, 54, 55, 59, 66.

Templates for Month 6 are; 1, 3, 4, 7, 13, 25, 27, 28, 34, 35, 38, 49, 51,
61, 61R, 62, 62R, 63, 63R, 65, 70, 101, 103.

Note: There is a problem with 3 Templates we are using this month. If you receive our fabric pack your templates have been corrected but if you use the CD from the book you will need to make some changes.

1. The numbers on #27 and #28 need to be swapped.
2. Template #61 should read 61R and there is no #61 on the CD. To make the correct #61, Reverse the template, from the book and trace onto card and cut out. Mark the straight grain on the templates lower edge, as per diagram and trace with this edge level with the long edge of the fabric then, mark the number of the template (61 or 61R) in this seam allowance.

We are using more of the beautiful Flower Sugar fabric this month. Before starting spray a light coating of starch on the wrong side of all the fabrics. Iron and cut as usual.

Week 21

Block 14 Butterfly at the Crossroads

Block 88 Star of Hope


Use Templates 34, 35, 38, 101. Cut the fabric for both blocks at the same time.

Using the Pink large roses fabric, Fussy Cut a 5 5/16’’ (13.5cm) square for #101. Then cut 6 x 1 ¾’’ squares for 6 #34 and 8 x 2 1/8’’ squares.

Using the White/Pink Spot fabric cut 4 x 3’’ x 1 ¾’’ rectangles for 4 #35, then cut 8 x 2 1/8’’ squares, matching these with the pink ones, make up into ½ square triangles as per week 3, to give you 16 #38.

Arrange all the pieces in place and sew together as per book.


Week 22

Block 40 Friendship Block


Block 62 Old Windmill


Use Templates 4, 7, 27, 28, 103

Friendship Block

Using the Yellow Floral Spot fabric Fussy Cut a 3 3/8’’ square for #103, then cut 6 x 2 3/8’’ squares, save 2 for block 62 and cut 4 on the diagonal and trim for 8 #7. As these last 4 are going to be cut in half, you can trace and cut if the full square won’t fit after fussy cutting.

Using the Pink Check fabric cut 4 x 1 ¼’’ strips down the short edge. Position the #27 and #28 on the strips with a small rose in the centre of the template and trim to size. Fussy Cut 4 x2’’ squares, also with a rose in the centre, for 4 #4. Arrange as per book. Sew 2 short strips to opposite sides of 103, then sew the longer strips in place and press. Make up corner triangles and sew in place.


Old Windmill.

Using the White/Pink Spot fabric cut 8 x 2 3/8’’ squares.
Then cut 2 x 2 3/8’’squares each in Pink Large Roses, Red Floral and Aqua Floral Spot. Match these together with the 2 Yellow squares and the 8 White/Pink spot squares and make into 16 ½ square triangles. Arrange as per photo and book, sew together in rows, pressing seams in alternating directions.


Week 23

Block 54 Kitchen Woodbox


Block 55 Linoleum


Use templates 1, 3, 13, 25, 49, 51, 65. Cut the fabric for both blocks at the same time.

Using the Aqua Floral Spot fabric, Fussy Cut 2 x 2 ½’’ squares for 2 #1 then, cut2 x 2 7/8’’ squares and cut on the diagonal and trim for 4 #3. Cut 4 x 1 15/16’’squares cut on the diagonal and trim for 8 #13, then cut 4 x 1 ½’’ x 2 ½’’ rectangles for 4 #25.

Using the Yellow Check fabric cut 5 x 1 ½’’ strips down short edge of fabric. Cross cut these into 2 #51 and 6 #25, keeping the small rose in the centre of each strip, as before.
Using the Pink Circle fabric trace and cut 4 #49 and 4 #65.

Arrange the pieces for each block. Sew block 54 from the centre out then add the corners. Sew block 55 as a 9 patch of 2 ½’’ squares.


Week 24

Block 59 Night and Day


Block 66 Periwinkle


Use templates 61, 61R, 62, 62R, 63, 63R, 70. Cut the fabric for both blocks at the same time.

Please read the Note above before proceeding.

Using the White/Red Spot Rose fabric trace and cut 8 #61 and 4 #61R, with the straight grain as marked on the diagram. Write the template number in the straight grain seam allowance, using the photo as a guide. I used a wash of marker to trace these if I made a mistake I could simply wash off and start again.  Then trace and cut 4 #62R and 4 #63R.

Using the Red Floral fabric trace and cut 4 #61R, 4 #62 and 4 #63. Then cut 2 #70.
Fussy Cut 2 #70 from the Pink large floral fabric.

Night and Day.
Gather all your pieces for this block and carefully lay them out in place. The straight grain on #61 and #61R should be next to each other. Sew each section into a triangle and press the seams towards the red fabric. Sew the triangles together, matching seams, into squares and press the seams open. Continue until complete. If you got this block right 1st go, well done!


Periwinkle.
Lay out your 4 coloured #70 in place. Arrange the #61 and #61R pieces in pairs, with the straight grain edges together, around the centre star so that the corners are right angles. Sew a #61 and a #61R to each #70. Press the red seams in and the pink seams out. Check your angles. Sew the triangles together matching the seams until complete.


These last two blocks were certainly tricky. I hope my instructions made them easier for you to sew. Before I realised that the template was wrong I had decided not to use them. I’m glad I kept them in the quilt now as there is no satisfaction in giving up!


(note template correction not at actual size, if you are in our quilt along the right size templates will be posted to you)

Happy sewing Debby and Eve xxx


Wednesday, 25 June 2014

Farmers Wife Quilt Along - Month 5 Instructions


We will be making Blocks 75, 85, 3, 30, 15, 52, 12, 91.

Templates for Month 5 are; 1, 3, 4, 5, 6, 6R, 7, 8, 9, 12, 13, 20, 58, 82, 89, 89R.

We are using some more beautiful Pam Kitty fabric this month.

Week 17


Make block 75 Rosebud and block 85 Square Dance.


Rosebud. Use templates 3, 8 and 13.


Using the Yellow Spot/ Rose fabric Fussy cut 2 x 4’’squares, cut them on the diagonal for 4 #8. Then cut 6 x 1 7/8’’squares, cut 2 on the diagonal for 4 # 13.
Using Pink Floral fabric cut 2 x 2 7/8’’ squares, cut on the diagonal for 4#3. Then cut 4 x 1 7/8’’ squares, match up with the 4 yellow squares and make ½ square triangles for 16 #13. Arrange all the pieces, sew into 4 squares, trim each to 3 ½’’ and sew together.


Square Dance. Use templates 19, 20, 82, 89 and 89R.


Using the Yellow Spot/Rose fabric Fussy cut a 4 ½’’ square for 1 #82. Then cut 2 x 2 ¼’’ squares, cut them on the diagonal, trim off the corners, for 4 # 20.
Using the Pink Floral cut 4 x 1 ½’’ squares for 4 #19.
Using the Green Floral fabric trace and cut 4 # 89 and 4 # 89R. Arrange and sew as per book.


Week 18

Make block 3 Basket and block 30 End of Day.


Basket. Use templates 4, 5, 6, 6R, 7, 8 and 9, plus RicRac for the handle.


Please prewash your RicRac before sewing onto block to be sure that it doesn't have any colour run or shrinkage. Press the RicRac from the back as some contain synthetic threads which may melt.

Using the White Floral fabric cut 1x 3 ½’’ square for #5, then cut 1 x 2’’ square for #4, then 2 x 3 ½’’ x 2’’ rectangles for 2 #9, then cut 1 x 2 3/8’’ square, cut on the diagonal, for 2 #7 and trace and cut 1#8.
Using Red Spot fabric cut 1 x 2 3/8’’ squares, cut on the diagonal, for 2 #7, then trace and cut 1 #6 and 1 #6R. Sew the white #7s to #6 and #6R, press the seam towards the red. Sew together in rows then add #8. Using the photo as a guide, unpick a few stitches and tuck in one end of the Ricrac. Pin and sew the handle in place, using tiny stitches along both sides, unpick a few stitches again and tuck in the end. Resew the seams closed.


End of Day. Use templates 6, 6R and 7.


Using the Red Spot fabric trace and cut 4 #6, then cut 2 x 2 3/8’’squares, cut on the diagonal, for 4 #7.
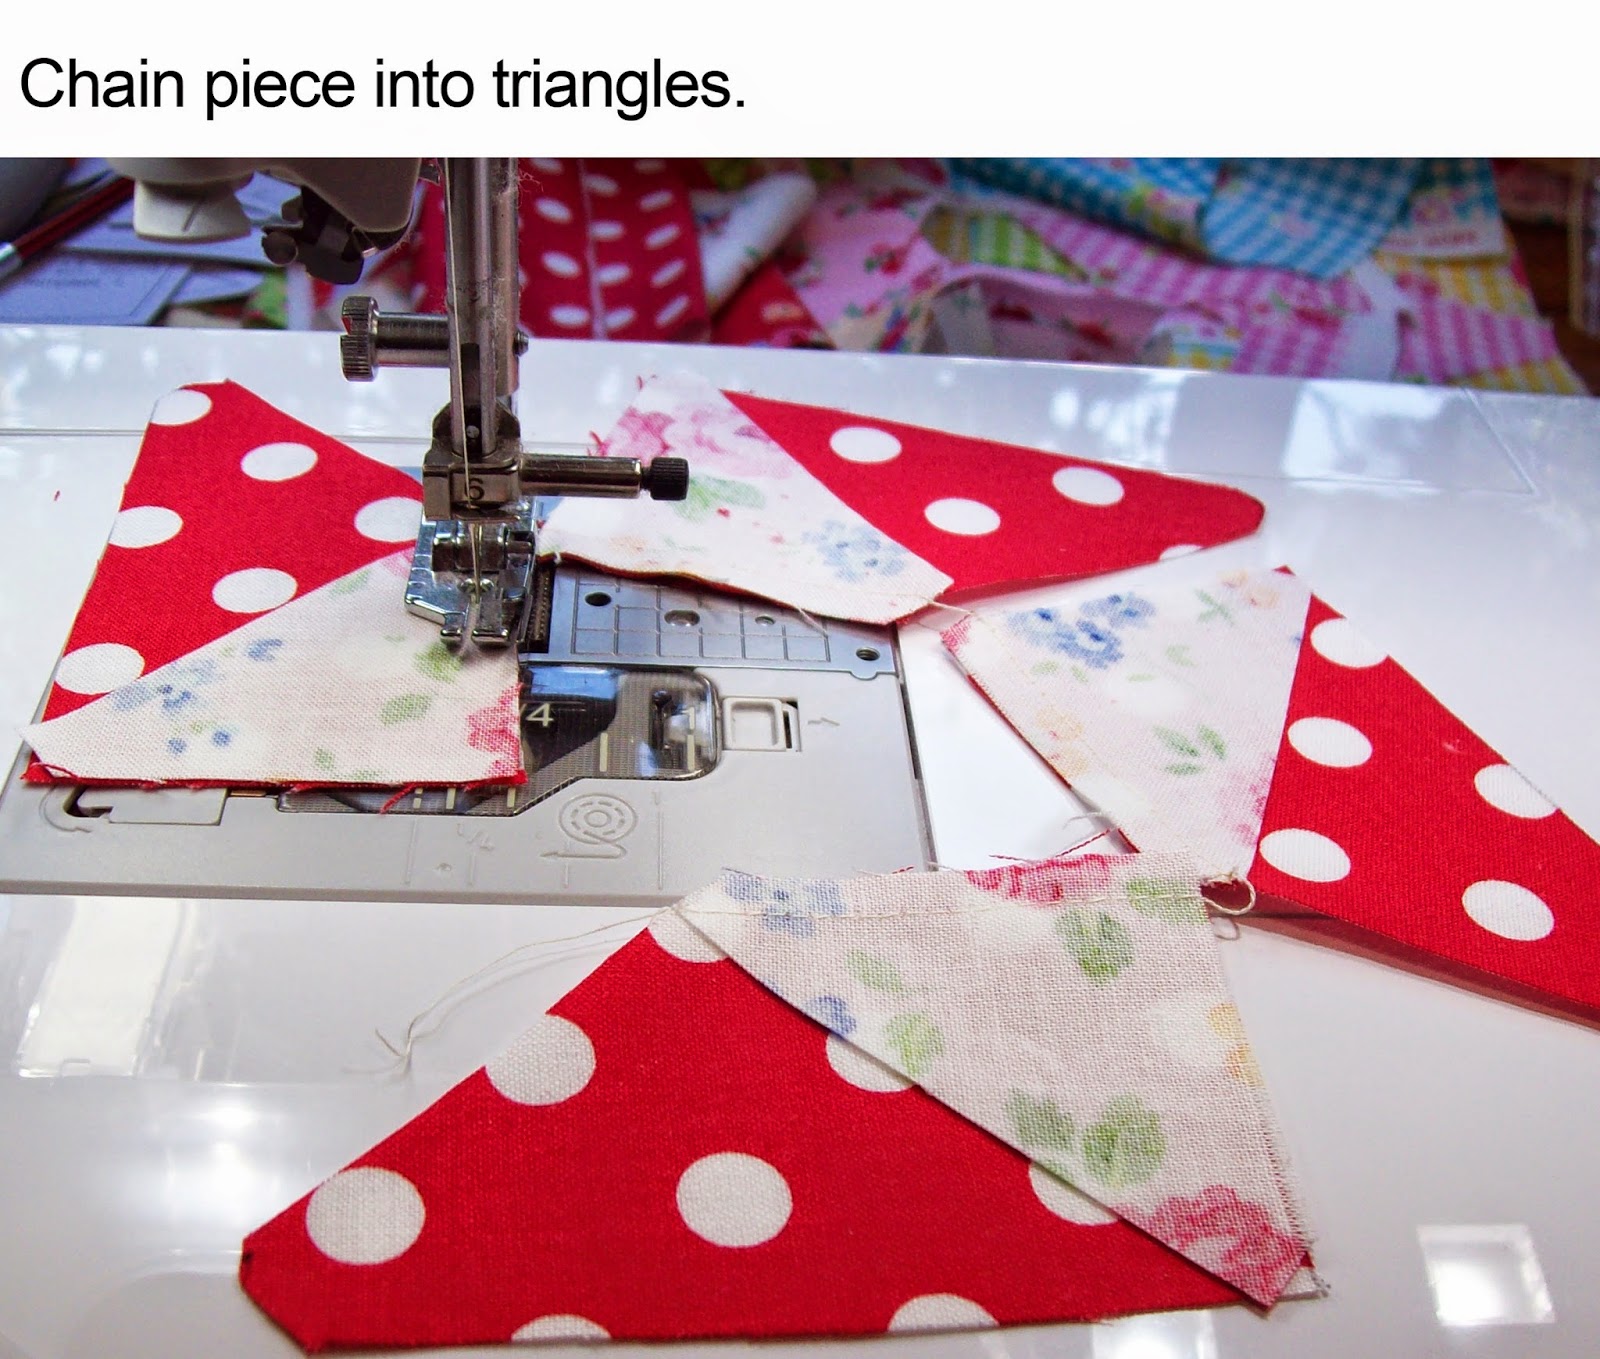
Using the White Floral fabric trace and cut 4 #6R, then cut 2 x 2 3/8’’squares, cut on the diagonal, for 4# 7. Chain piece a contrasting #7 to #6 or #6R to make a triangle. Press seams towards the red. Sew together into 4 squares and trim to 3 ½’’. Sew together as per photo .


Week 19. 

Make block 15 Buzzards Roost and block 52 Hovering Hawks.


Buzzards Roost. Use templates 5, 7 and 12.


Using the White Floral fabric cut 1x 3 ½’’ square for #5, then cut 1 x 3’’ square, cut on the diagonal for 2 #12, then cut 4 x 2 3/8’’ squares, cut on the diagonal for 8 #7.
Using the Pink Floral fabric cut 3 x 3’’ squares, cut on the diagonal for 6 #12. Trim off all corners to match the templates. Arrange as per photo and sew as per book.
 
Hovering Hawks. Use templates 4, 7 and 58.


Using the White Floral fabric cut 5 x 2 3/8’’ squares, cut 2 on the diagonal for 4 #7. Trace and cut 2 x #58.
Using the Pink Floral fabric cut 4 x 2’’ squares for 4 #4, then cut 4 x 2 3/8’’squares, cut 1 on the diagonal for 2 #7, then use the 6 remaining squares to make ½ square triangles. Arrange as per book, sew into 4 squares then sew together.


Week 20. 


Make block 12 Broken Sugar Bowl and block 91 Strawberry Basket.

Broken Sugar Bowl. Use templates 1, 3 and 19.


Using the Red Floral fabric Fussy cut 2 x 2 ½’’squares for 2 #1, then cut 4 x 1 ½’’ squares for 4 #19.
Using the Yellow Small Floral fabric cut 2 x 2 7/8’’squares and 4 x 1 ½’’ squares for 4 x #19.
Repeat this for the Green Floral fabric. Using the 4 x 2 7/8’’ squares make up into ½ square triangles. Arrange as per book, sew 4 small squares together and trim to 2 ½’’ squares, sew together in rows.


Strawberry Basket. Use templates 1, 3, 13 and 19.


Using the Green floral fabric cut 2 x 2 ½’’ squares for 2 # 1, then cut 1 x 2 7/8’’ square, cut on the diagonal for 2 #3, then trace and cut 1 #3.
Using the Red Floral fabric trace and cut 1 #3, then cut 2 x 1 15/16’’squares, cut on the diagonal for 4 #13 and cut 2 x 1 ½’’ squares for 2 #19.
Using the Yellow Small Floral fabric cut 2 x 1 ½’’squares for 2 # 19.
To make the red and yellow checks, cut 2 x 1 ½’’ strips from each fabric and sew one of each’ right sides together, lengthways. Repeat with the other 2 strips. Press the seams towards the red. Cross cut these into 7 x 1 ½’’ units. Arrange and sew as per book using the green #3 in the lower corner.


Gosh! That’s 40 blocks done and still so many pretty ones to go.

Happy sewing, Debby and Eve.xx